5 Plumbing Fixes You Can Do Yourself
Routine home maintenance might not be the most glamorous part of home ownership, but when it comes to keeping your home sweet home running smoothly, a proactive approach can make a huge difference. Plumbing, a vital part of any house, is often neglected until a dripping faucet becomes a torrent, or a clogged sink brings the family meeting to the bathroom.
Learning to tackle some of the smaller plumbing issues can save you time and money—plus it's a rewarding way to connect with the inner DIYer in you. In this extensive guide, we'll walk you through five common plumbing fixes that even the most tool-phobic homeowners can handle.
Fixing a Leaky Faucet
Why It's Important
Not only can a leaky faucet be annoying, but it can also waste hundreds of gallons of water a year, which isn't kind on your water bill. Fortunately, stopping the drip is often as simple as replacing a washer or cartridge.
How To Fix a Leaky Faucet
To fix a leaky faucet, you usually need to disassemble the fixture, identify the problematic part, and either clean, tighten, or replace it. Here's a step-by-step guide:
Step 1: Turn Off the Water
Start by turning off the water supply to your faucet. This is usually located under the sink. If you can't find the shut-off valve, you may need to turn off the main water supply to your house.
Step 2: Prepare Your Work Area
Place a towel in the sink to avoid damaging it and to catch any small parts that may fall during disassembly.
Step 3: Disassemble the Faucet
Depending on the type of faucet you have, use a Phillips screwdriver, a wrench, or both to remove the handle and the rest of the faucet.
Step 4: Identify the Issue
Look for the cause of the leak. It's often a worn-out washer, O-ring, cartridge, or valve seat. Clean the area to ensure you have a clear view of the problem.
Step 5: Fix the Problem
If it's a washer or O-ring, they can usually be removed with a screwdriver and replaced with an exact match from your local hardware store. For other issues, you may need to replace the cartridge or call in a professional.
Step 6: Reassemble the Faucet
Once the defective part is fixed or replaced, reassemble the faucet in reverse order.
Step 7: Turn On the Water
Slowly turn on the water to the faucet and check for leaks. If the leak persists, you may need to tighten the faucet more or check for other issues.
Tools You'll Need
- Adjustable wrench
- Screwdriver (flathead or Phillips, depending on the faucet type)
- New washers, O-rings, cartridges, or valve seats as needed
Safety Tips
Faucets often have small parts that can get lost, so work in a well-lit area and keep track of all pieces. Be sure to turn off the water before you begin to avoid any unexpected gushers.
Unclogging a Drain
Why It's Important
A clogged drain is not only a hassle, but it can also lead to slow drainage and unsanitary conditions.
How To Unclog a Drain
There are several methods you can use to unclog a drain. Here are the most common:
Baking Soda and Vinegar
Pour 1/2 cup of baking soda down the drain, followed by 1/2 cup of white vinegar. Cover the drain if you can, and wait 15 minutes. Flush the drain with boiling water.
The Plunger
Fill the sink or tub with enough water to cover the bell of the plunger. Place the plunger over the drain, making sure it has a good seal. Pump the plunger up and down forcefully several times. If it's a double sink, plug the other side with a wet cloth or use a second plunger.
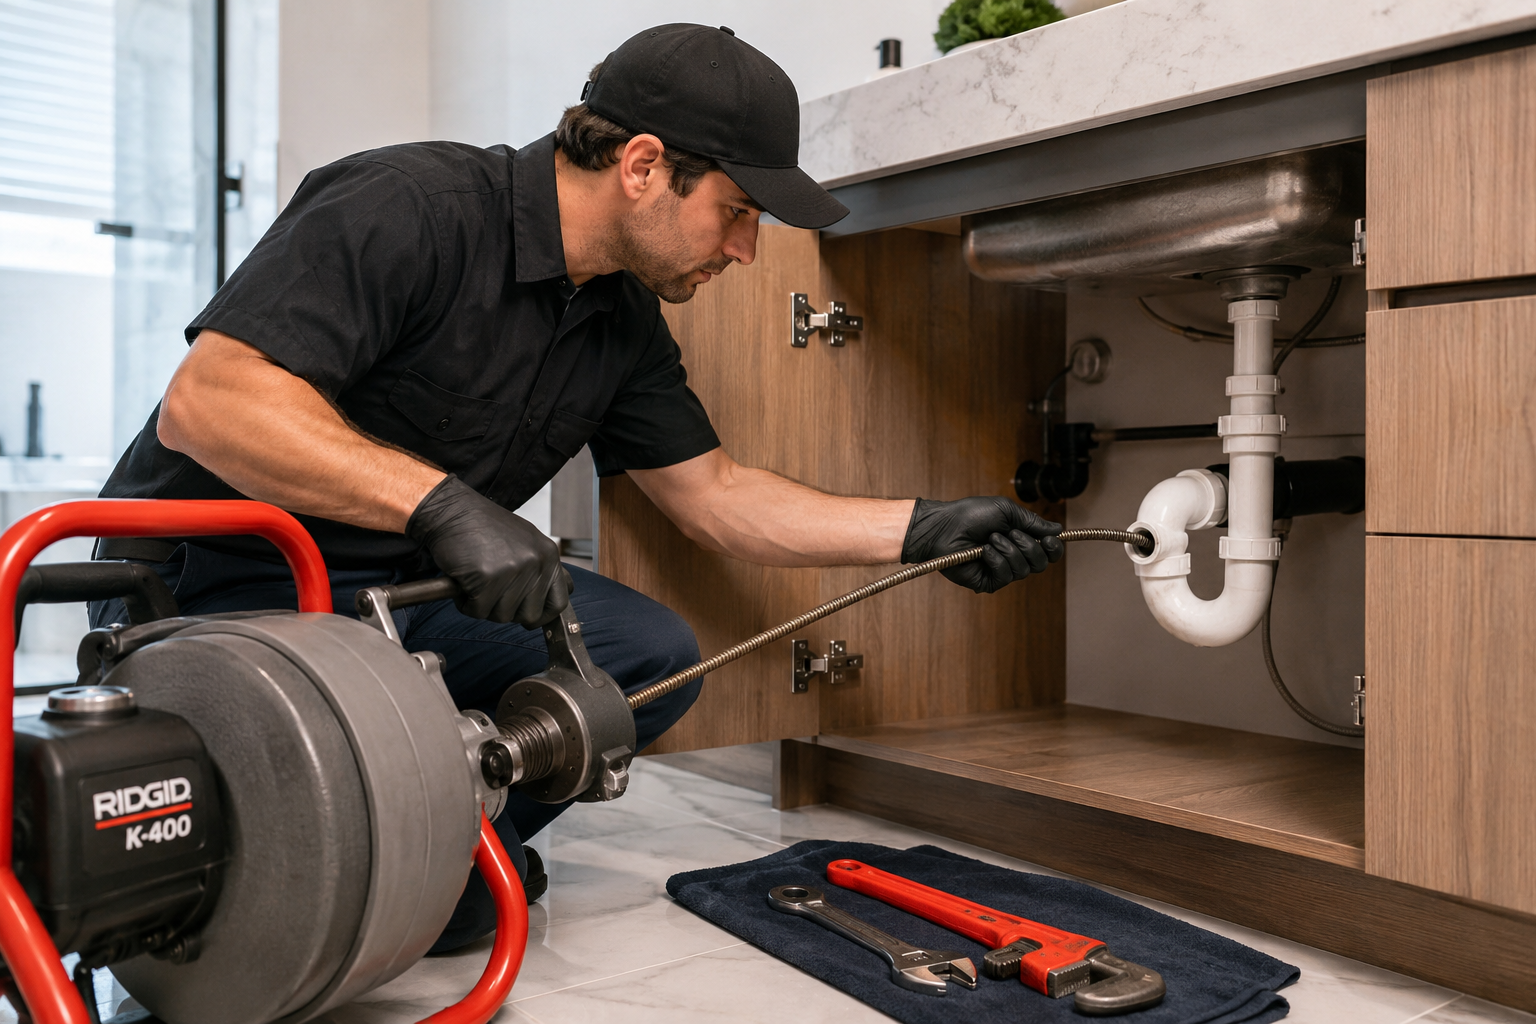
The Drain Snake
Use a drain snake to push through the clog. For a sink, the snake is often inserted directly into the drain. For a bathtub or shower, you will need to remove the stopper to access the drain. When you feel resistance, turn the snake's handle clockwise to dislodge the clog.
Tools You'll Need
- Plunger
- Drain snake
- Baking soda and vinegar
- Boiling water
Safety Tips
Don't mix chemical drain cleaners with other products, especially vinegar in a drain previously cleaned with bleach, as it can create toxic fumes. When using a drain snake, be cautious not to push too hard and damage the pipes.
Replacing a Toilet Flapper
Why It's Important
A toilet flapper that doesn't form a proper seal can cause water to continuously run into your toilet bowl, wasting water and money. It's a common issue and often means it's time for a new flapper.
How To Replace a Toilet Flapper
Replacing a toilet flapper is relatively simple:
Step 1: Turn Off the Water
Locate the shut-off valve behind your toilet and turn it clockwise to turn off the water supply.
Step 2: Drain the Toilet Tank
Flush the toilet and hold down the handle to drain the tank completely.
Step 3: Remove the Old Flapper
Depending on the type of flapper, you may need to unhook a small chain or slide it off the overflow tube.
Step 4: Install the New Flapper
Position the new flapper over the opening at the bottom of the tank. Reattach the chain to the flush lever, ensuring there is slack in the chain when the flapper is closed.
Step 5: Turn On the Water
Turn the water supply back on and allow the tank to fill. Check for any leaks and adjust the chain length as needed to ensure a full seal when the flapper is closed.
Tools You'll Need
- New toilet flapper (ensure it's the right model for your toilet)
- Gloves (optional)
- A towel (to clean any water that may spill out when removing the old flapper)
Safety Tips
The most critical step is to turn off the water. Be careful not to drop anything into the toilet bowl while removing or installing the flapper.
Repairing a Running Toilet
Why It's Important
A running toilet is usually a sign of wasted water. It could be due to a faulty flapper, fill valve, or overflow pipe.
How To Fix a Running Toilet
To repair a running toilet, you'll need to troubleshoot the cause:
Step 1: Identify the Issue
Remove the lid from the toilet tank. Watch and listen to see what's happening when the toilet is running.
Step 2: Check the Flapper
Inspect the flapper to make sure it is forming a proper seal. If not, it may need adjustment or replacement.
Step 3: Examine the Fill Valve
Ensure the fill valve is not stuck. It should shut off when the tank is full.
Step 4: Look at the Float
If the float is set too high, it can cause the water level to rise above the overflow pipe and run continuously. Adjust the float to the correct height.
Step 5: Check for Leaks
A toilet that is constantly running may have a leak. You can conduct a dye test to see if water from the tank is leaking into the bowl without flushing.
Tools You'll Need
- Dye tablet or food coloring (optional)
- Gloves (optional)
- Towel (to clean any water that may spill out when inspecting the tank)
Safety Tips
Take care when handling the components inside the tank. Do not force anything, and handle the porcelain carefully to avoid cracking or breaking the tank, which would require a costly replacement.
Patching a Leaking Pipe
Why It's Important
A leaking pipe can cause water damage to your home's structure and promote mold growth, in addition to wasting water.
How To Patch a Leaking Pipe
To patch a leaking pipe, you have a few options depending on the nature of the leak and the size of the hole:
Pipe Repair Clamp
For small leaks in straight pipe sections, a pipe repair clamp can be a quick and effective solution. Ensure the pipe is clean and dry, then simply position the clamp over the leak and tighten the screws until the leak is sealed.
Epoxy Putty
Epoxy putty is a versatile and can be used to repair leaks in pipes of varying materials. Knead the putty to activate it, then apply it firmly over the leak. Allow it to cure as per the manufacturer's instructions. Once hardened, it will create a strong seal.
Pipe Wrap
Pipe wrap products can be used for temporary fixes or for leaks in hard-to-reach areas, such as behind walls. These wraps are impregnated with a resin that activates when wet. Simply wrap the product around the leak and smooth out any creases, then wait for the resin to set.
Tools You'll Need
- Pipe repair clamp
- Epoxy putty
- Pipe wrap
- Appropriate cleaning materials (pipe brush, sandpaper, etc.)
Safety Tips
Be extremely cautious if the leak is in a place where water and electricity could come into contact. In such cases, it's best to shut off the electricity in the affected area before working on the pipe.
Armed with the knowledge from this guide, you're well on your way to becoming a homeowner hero. DIY plumbing repairs can not only save you money but can also provide a sense of satisfaction and empowerment.
Experience tells us that even with the most thorough guide, sometimes the best solution is having an expert by your side. If you're facing a plumbing project that seems a bit beyond your comfort level, don't hesitate to contact our Hamilton plumbers at Rescue Rooter for professional assistance.
For those about to DIY, we salute you. And remember, play it safe, take your time, and don't hesitate to reach out if you need a hand.