How to Use a Plunger to Clear Clogged Sinks and Toilets

Robbie Balla • June 10, 2025

How to Use a Plunger to Clear Clogged Sinks and Toilets

Picture this - you're brushing your teeth or flushing the toilet, and suddenly, the water begins to rise rather than disappear down the drain. The dreaded clogged sink or toilet blockage is not only inconvenient but can also lead to serious plumbing issues if ignored. Fortunately, there's a simple, time-tested tool that comes to the rescue in these situations – the plunger.

If you're in Hamilton and dealing with plumbing woes, learning proper plunger techniques could save you both time and money. Here's a guide to help you master the art of plunging and tackle those stubborn clogs.


Why do drains and toilets clog?

Before you grab your plunger, take a moment to understand why clogs happen. For sinks, common culprits include hair, grease, soap scum, and food particles stuck in the pipes. Toilets tend to get blocked by flushing too much toilet paper, non-flushable items, or debris that builds up over time. Knowing what causes the problem can help you prevent future blockages.


Choosing the right plunger

Not all plungers are created equal. Having the right one for the job can make a big difference. Here are the two types you should know:

  • Cup Plunger: Ideal for flat surfaces like sinks or tubs. It has a simple rubber cup at the bottom.
  • Flange Plunger: Best for toilets. It features a rubber cup with an additional flange at the end, which provides a better seal for th

If you're only going to invest in one plunger, consider getting a multi-purpose flange plunger that works for both sinks and toilets.

Step-by-step guide to using a plunger effectively

1. Prepare the Area

Before you begin, ensure there's enough water in the sink or toilet to cover the plunger's rubber cup. If needed, add water manually. This helps create a better seal. Also, place towels on the floor to catch any splashes.

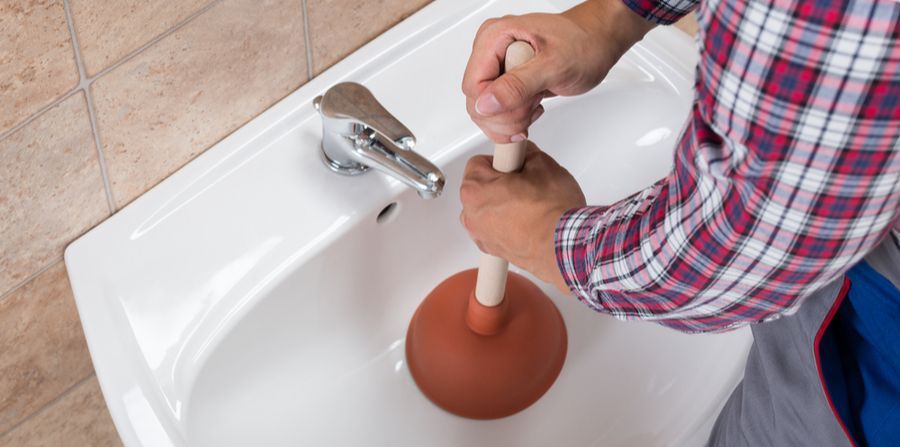
2. Position the Plunger

  • For sinks: Place the plunger directly over the drain, ensuring it fully covers the opening.
  • For toilets: Insert the plunger into the bowl, making sure the flange at the bottom forms a tight seal with the drain.

3. Create a Vacuum

Push the plunger down gently at first to eliminate any air inside. A tight seal is crucial for building the necessary suction.

4. Use Steady Motions

Using firm, even strokes, push the plunger down and pull it back up without breaking the seal. Repeat this motion about 10-20 times. The suction and pressure should help dislodge the clog.

5. Check for Results

If water drains easily after plunging, you've successfully cleared the blockage! For stubborn clogs, you may need to repeat the process or use additional tools like a plumber's snake.

6. Clean Up

Wash the plunger thoroughly after use. Disinfect the sink or toilet and sanitize any areas that may have come in contact with dirty water.

When to call professionals

If you've followed these steps and the clog still won't budge, it might be time to call a professional plumber, like the team at A Rescue Rooter.  More serious blockages could indicate issues deeper within your plumbing system that require specialized tools and expertise to repair.

Don't wait too long to seek help, as unresolved clogs can lead to pipe damage, leaks, or water overflow.


Pro tips to prevent future clogs

  • Avoid pouring grease, coffee grounds, or food waste down the sink.
  • Use sink strainers to catch debris before it goes down the drain.
  • Avoid flushing anything other than toilet paper and human waste.
  • Clean your drains regularly with hot water or a vinegar and baking soda mixture.

Knowing how to use a plunger can save you from the stress (and mess) of dealing with a clogged sink or toilet. By choosing the right plunger and following proper techniques, you'll be able to handle most minor blockages like a pro. However, don't hesitate to reach out for help if the clog proves too stubborn. With the plumbing experts at Rescue Rooter in Hamilton, your drains will be clear and functional in no time.

For more tips or professional assistance, contact us today – because everyone deserves smooth plumbing!


By Chelsey Smith April 24, 2026
When a pipe bursts or a drain backs up, most people panic and call the first name they find online. But choosing the wrong plumber can cost you far more than the original problem. If you’re searching for reliable Hamilton plumbers , knowing what to look for can save you time, money, and serious stress. Here’s how to confidently choose a reputable plumber and make sure they’re properly licensed.
By Chelsey Smith April 2, 2026
When a drain backs up, panic often sets in—but before you reach for harsh chemicals or call it a lost cause, a simple plunger can often do the trick. Knowing how to use the right type of plunger—and how to use it correctly—can save you time, money, and stress. In this guide, we’ll walk you through how to use both toilet and sink plungers effectively, and when it’s time to call in the professionals at A Rescue Rooter in Southern Ontario.
February 27, 2026
As the snow melts and the first green shoots of spring appear, it feels natural to breathe a sigh of relief. The harsh winter is finally behind us, and warmer days are ahead. However, while you are ready to welcome the sunshine, your home’s plumbing system might be facing its most difficult challenge of the year.  The transition from freezing winter temperatures to the damp warmth of spring creates specific environmental changes that can stress your pipes. Understanding what happens beneath the ground during the "spring thaw" is the first step in protecting your home from unexpected leaks and water damage. By staying vigilant and knowing what to look for, you can ensure your plumbing transitions into the new season as smoothly as you do. How the Spring Thaw Affects Your Plumbing It is easy to assume that the danger to your pipes passes once the sub-zero temperatures vanish. In reality, the thawing process can be just as damaging as the freezing process. When the ground freezes, it expands. As it thaws, the soil contracts and shifts. This movement can put immense pressure on your home's water and sewer lines buried underground. If the earth shifts too dramatically, it can cause pipes to crack, bend, or even detach completely. Additionally, the spring thaw brings water—lots of it. Melting snow saturates the soil, raising the water table. This excess water puts hydrostatic pressure on your foundation and pipes, potentially leading to basement flooding if your drainage systems aren't working perfectly. Common Signs of Pipe Damage Because much of your plumbing is hidden behind walls or buried underground, you might not notice an issue until it becomes a significant problem. Keep a close eye on your property this season for these tell-tale signs of distress: 1. Soggy patches in the yard If it hasn't rained recently, but you notice distinct wet, spongy, or unusually green patches of grass in your yard, this could indicate a leak in your underground water line. The escaping water rises to the surface, creating a localized swamp. 2. Low water pressure A sudden drop in water pressure throughout the house is often a symptom of a breach in the main line. If the water isn't reaching your faucets with the usual force, it may be escaping somewhere else along the route. 3. Unpleasant odors If your sewer line has been compromised by shifting soil or infiltrating tree roots (which become active in spring), you may smell sewage inside your home or out in the yard. This is an urgent issue that requires immediate attention. 4. Unexpectedly high water bills Sometimes the signs are financial rather than physical. If your water usage hasn't changed but your bill has spiked, water is likely leaking from a pipe somewhere on your property. Preventive Measures for Homeowners While you cannot control the weather or the shifting soil, there are several steps you can take to minimize the risk of damage during the spring thaw. Test your sump pump: This is your first line of defense against meltwater. Pour a bucket of water into the sump pit to ensure the pump activates and drains the water effectively. If it doesn't, you need to repair or replace it before the heavy spring rains arrive. Clear your gutters and downspouts: Ensure that melting snow and spring rain can flow freely away from your home’s foundation. Clogged gutters can cause water to pool around the base of your house, increasing pressure on basement pipes and the foundation. Check outdoor faucets: Once the threat of frost is truly gone, turn on your outdoor spigots to check for flow. If you place your thumb over the opening and can stop the flow of water, the pressure is too low, indicating a potential leak inside the pipe. When to Call the Professionals Plumbing issues can be stressful, and it is often difficult to know if a problem is a simple DIY fix or a professional emergency. We understand that your home is your sanctuary, and dealing with water damage is disruptive and upsetting. If you notice persistent low pressure, damp spots on your drywall, or standing water in your yard, it is time to call for help. Attempting to dig up underground pipes or fix complex sewer lines on your own can often lead to further damage and higher costs. At Rescue Rooter, we have the specialized equipment to inspect underground lines without destroying your yard. Our team can identify cracks caused by the spring thaw and provide efficient, lasting solutions. We are here to help restore your peace of mind so you can get back to enjoying the warmer weather. Enjoying a Worry-Free Spring Spring should be a time of renewal and enjoyment, not a time spent worrying about wet basements or broken pipes. By keeping an eye out for the signs of shifting soil and testing your drainage systems early, you can catch small issues before they become major headaches. And remember, if the thaw does bring unexpected plumbing challenges, you don't have to face them alone—Rescue Rooter is just a phone call away.
Show More