How To Repair a Running Toilet

Ezra Rivera • June 5, 2023

Are you annoyed with the constant sound of a running toilet?

Do you dread hearing that loud, steady drip-drip-drip after each flush? Have no fear — while repairing a running toilet can seem daunting at first, it’s actually not as difficult as it may seem. All you need is a couple of basic home improvement tools and some patience! In this blog post, we will provide an in-depth guide on how to repair a running toilet so you don't have to hear those annoying dripping sounds anymore. Keep reading to learn easy steps to quickly put an end to your water woes!


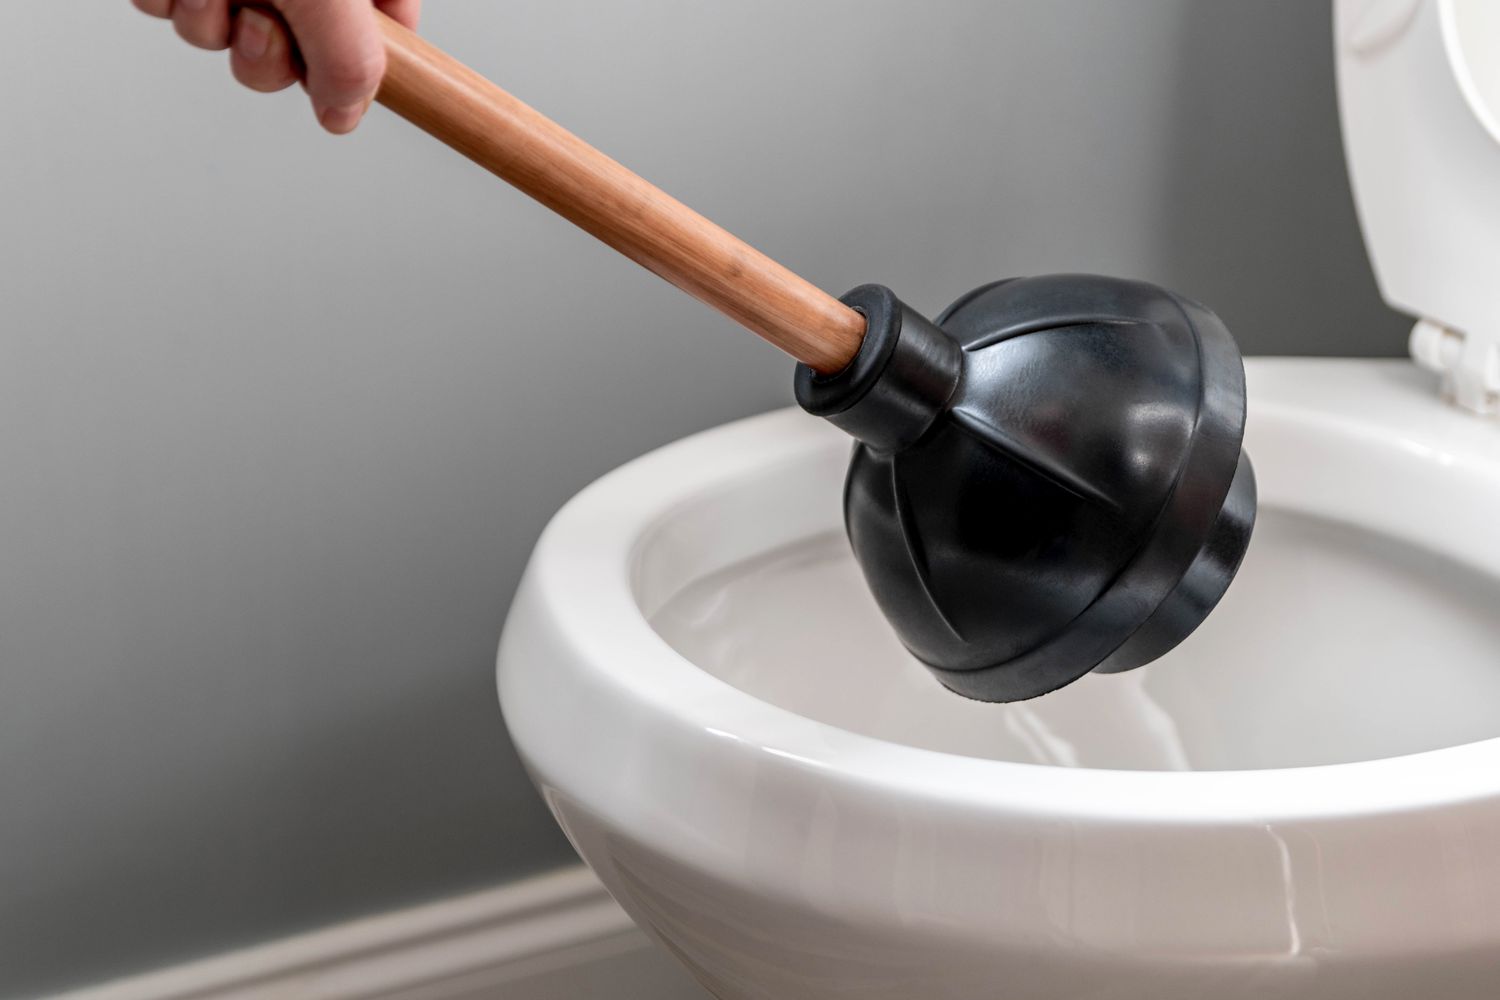
Diagnose the problem by assessing any water or sound coming from the toilet


When you notice strange sounds or water coming from your toilet, it can be concerning. Fortunately, this can be a sign of a minor issue that can be easily identified and repaired. To diagnose the problem, start by checking the water level in the tank and the bowl. If the water level in the tank is too high or too low, adjust it accordingly. Check to make sure the flapper is properly sealing the drain and not allowing water to escape. Additionally, check the fill valve and float to ensure they are not damaged or malfunctioning. With a little troubleshooting, you can solve the issue and restore your toilet's normal operation.


Shut off the water supply to the
toilet and flush it to drain out any remaining water


When it comes to fixing a toilet, shutting off the water supply and flushing it to drain out any remaining water is an essential step. Not only does it make the process less messy, but it also reduces the risk of any accidental spillage. Too often, small repairs are botched due to improper preparation, leading to bigger (and costlier) problems down the line. Taking the time to properly shut off the water supply and flush the toilet is a quick and easy way to ensure a successful repair. So, the next time you're faced with a wobbly or leaky toilet, don't skip this crucial step!


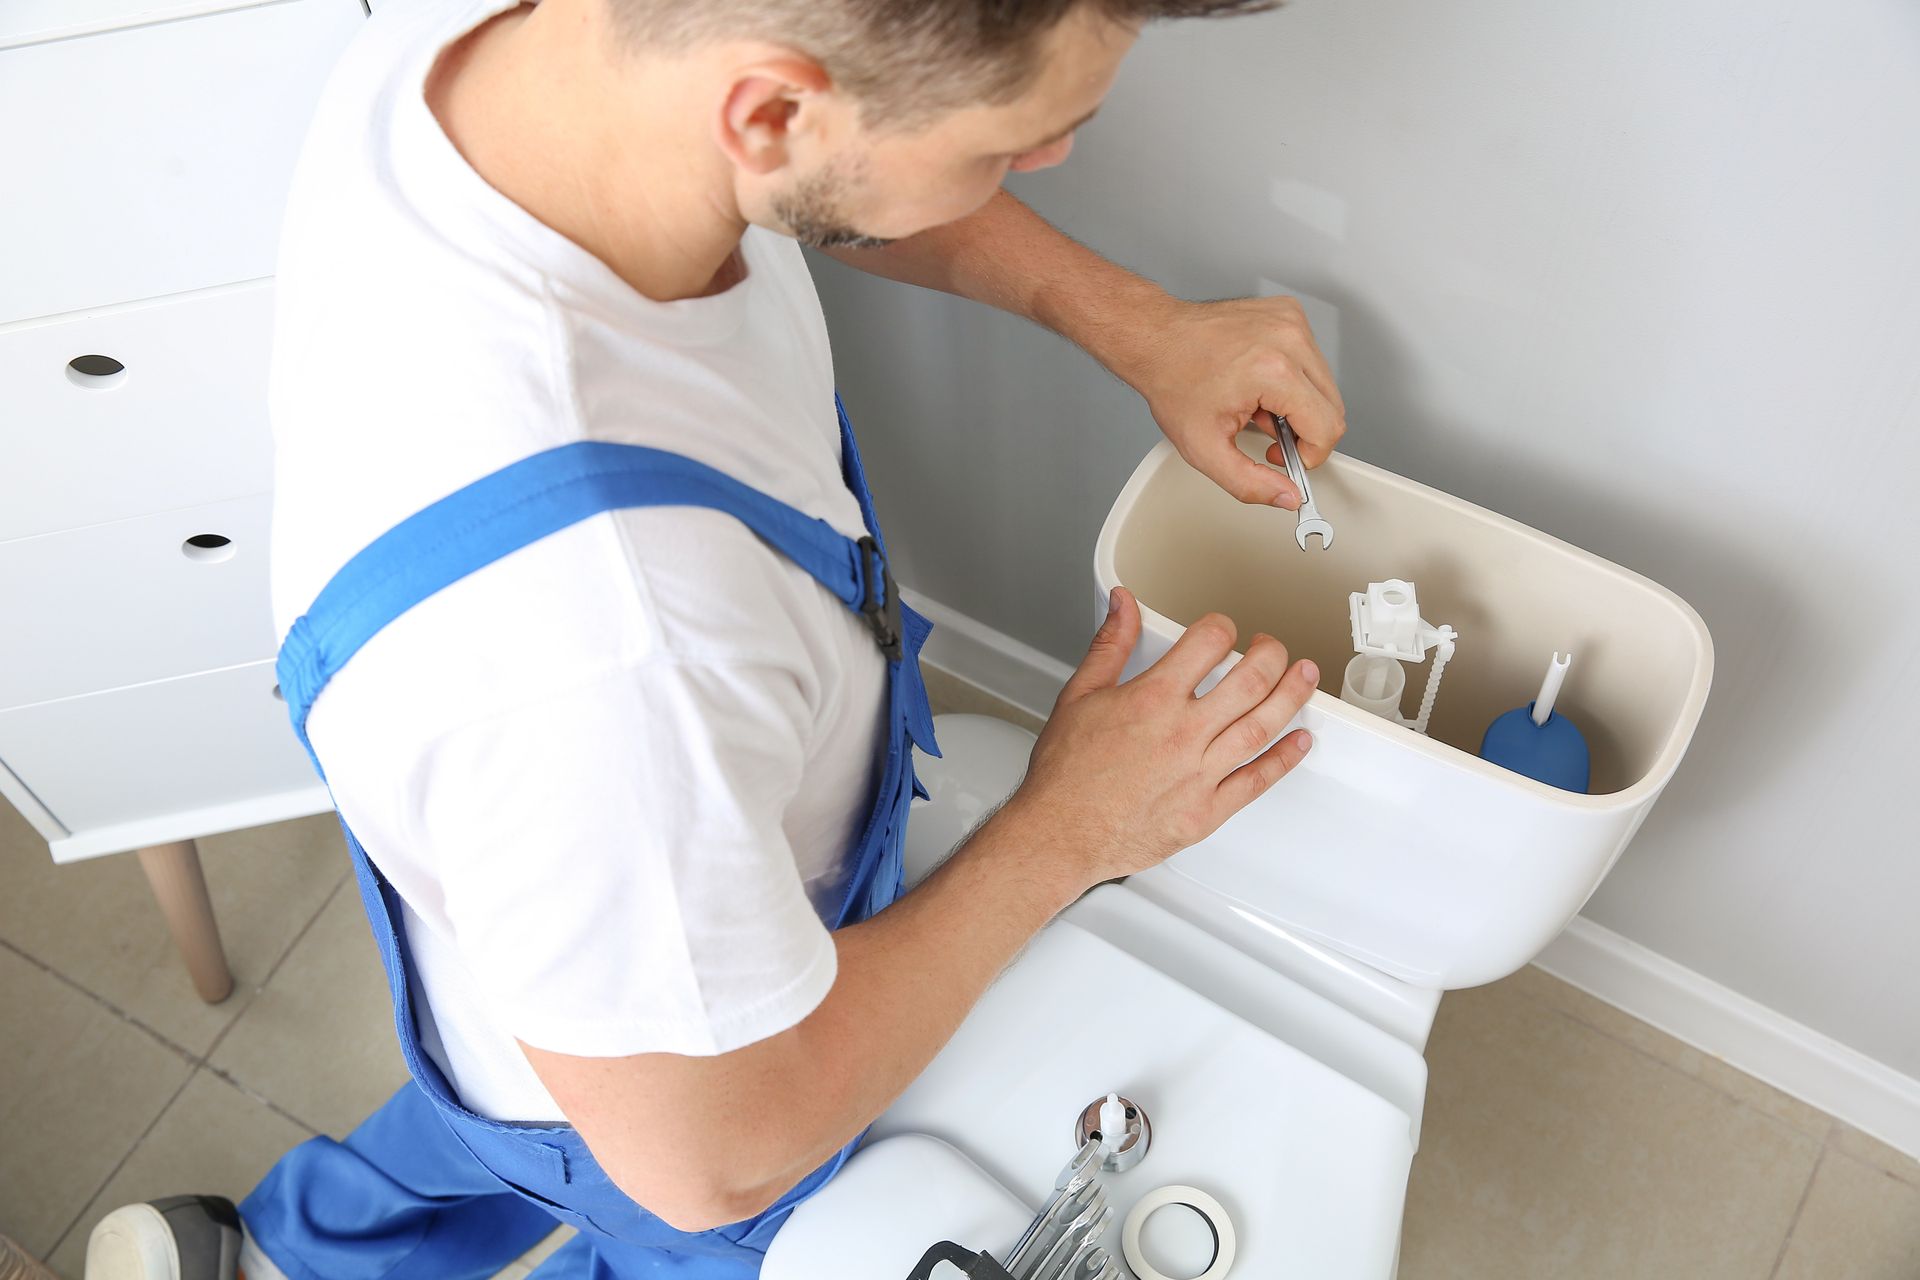
Disassemble the tank by removing the lid and flapper valve


Taking apart a tank may seem like a daunting task, but with a little know-how it can be done efficiently and quickly. The first step is to remove the lid and flapper valve. This may require some strength, but it's important to be careful not to damage any surrounding parts. Once the lid and flapper valve are removed, you'll have access to the tank's inner workings. With a better view, you can now identify any potential issues and work to fix them. Disassembling a tank may seem intimidating, but with a methodical approach, it can be accomplished with ease.


Clean the flapper valve with a brush and soap, then reinstall it


A properly functioning flapper valve is essential for a toilet to work effectively. If you are experiencing trouble with your toilet flushing correctly, it might be time to give your flapper valve some attention. The good news is that this is a simple fix that you can do yourself. To clean the flapper valve, start by removing it from the toilet and gently scrubbing it with a brush and some soapy water. Be sure to remove any debris or buildup that might be interfering with the valve's operation. Once it is clean, simply reinstall the valve and test your toilet to see if it is flushing properly again.  With just a little bit of effort, you can have your toilet working like new again in no time!


Replace any broken pieces such as a gasket seal or flush handle


When it comes to maintaining your toilet, it's important to replace any broken pieces as soon as possible to avoid any further damage or issues. Whether it's a faulty gasket seal or a broken flush handle, it's crucial to address the problem promptly. A faulty gasket seal can result in leaks or even mold growth, while a broken flush handle can make it difficult to properly flush waste away. By taking the time to replace any broken pieces, you can ensure that your toilet functions properly and avoid any potential costly repairs down the line.


Refill the tank with freshwater and test to make sure it's running properly


There's nothing quite like the satisfaction of a job well done, especially when it comes to something as important as your water tank. It's crucial to keep it in good condition to ensure that you have clean and safe water for you and your family. After you've emptied and cleaned your tank, it's time to refill it with fresh water and do a test run to make sure everything is functioning properly. This step is essential in guaranteeing that your system is working at its full potential. By taking these proactive measures, you can rest assured that your water quality is up to par, and you'll be able to enjoy crystal-clear H2O all year round.


Whether your toilet is making strange noises or just not working properly, you should be able to identify and address the most common toilet problems. Taking a few simple steps towards troubleshooting the problem such as shutting off the water supply, flushing, disassembling and cleaning, replacing broken parts, and refilling with fresh water can help get your toilet back up and running again. And if you're still facing trouble after following these tips, don't hesitate to contact a professional  like Rescue Rooter who will be glad to help for your
Toilet Repair Hamilton.  So keep in mind that plumbing services are always available for any persistent issues that may arise from the inner workings of your toilet. All it takes is some basic diagnostics and knowledge of how toilets work in order to avoid frustration when dealing with plumbing problems. With some patience and a little bit of know-how, you can have your toilet running smoothly and safely again in no time!

By Chelsey Smith April 24, 2026
When a pipe bursts or a drain backs up, most people panic and call the first name they find online. But choosing the wrong plumber can cost you far more than the original problem. If you’re searching for reliable Hamilton plumbers , knowing what to look for can save you time, money, and serious stress. Here’s how to confidently choose a reputable plumber and make sure they’re properly licensed.
By Chelsey Smith April 2, 2026
When a drain backs up, panic often sets in—but before you reach for harsh chemicals or call it a lost cause, a simple plunger can often do the trick. Knowing how to use the right type of plunger—and how to use it correctly—can save you time, money, and stress. In this guide, we’ll walk you through how to use both toilet and sink plungers effectively, and when it’s time to call in the professionals at A Rescue Rooter in Southern Ontario.
February 27, 2026
As the snow melts and the first green shoots of spring appear, it feels natural to breathe a sigh of relief. The harsh winter is finally behind us, and warmer days are ahead. However, while you are ready to welcome the sunshine, your home’s plumbing system might be facing its most difficult challenge of the year.  The transition from freezing winter temperatures to the damp warmth of spring creates specific environmental changes that can stress your pipes. Understanding what happens beneath the ground during the "spring thaw" is the first step in protecting your home from unexpected leaks and water damage. By staying vigilant and knowing what to look for, you can ensure your plumbing transitions into the new season as smoothly as you do. How the Spring Thaw Affects Your Plumbing It is easy to assume that the danger to your pipes passes once the sub-zero temperatures vanish. In reality, the thawing process can be just as damaging as the freezing process. When the ground freezes, it expands. As it thaws, the soil contracts and shifts. This movement can put immense pressure on your home's water and sewer lines buried underground. If the earth shifts too dramatically, it can cause pipes to crack, bend, or even detach completely. Additionally, the spring thaw brings water—lots of it. Melting snow saturates the soil, raising the water table. This excess water puts hydrostatic pressure on your foundation and pipes, potentially leading to basement flooding if your drainage systems aren't working perfectly. Common Signs of Pipe Damage Because much of your plumbing is hidden behind walls or buried underground, you might not notice an issue until it becomes a significant problem. Keep a close eye on your property this season for these tell-tale signs of distress: 1. Soggy patches in the yard If it hasn't rained recently, but you notice distinct wet, spongy, or unusually green patches of grass in your yard, this could indicate a leak in your underground water line. The escaping water rises to the surface, creating a localized swamp. 2. Low water pressure A sudden drop in water pressure throughout the house is often a symptom of a breach in the main line. If the water isn't reaching your faucets with the usual force, it may be escaping somewhere else along the route. 3. Unpleasant odors If your sewer line has been compromised by shifting soil or infiltrating tree roots (which become active in spring), you may smell sewage inside your home or out in the yard. This is an urgent issue that requires immediate attention. 4. Unexpectedly high water bills Sometimes the signs are financial rather than physical. If your water usage hasn't changed but your bill has spiked, water is likely leaking from a pipe somewhere on your property. Preventive Measures for Homeowners While you cannot control the weather or the shifting soil, there are several steps you can take to minimize the risk of damage during the spring thaw. Test your sump pump: This is your first line of defense against meltwater. Pour a bucket of water into the sump pit to ensure the pump activates and drains the water effectively. If it doesn't, you need to repair or replace it before the heavy spring rains arrive. Clear your gutters and downspouts: Ensure that melting snow and spring rain can flow freely away from your home’s foundation. Clogged gutters can cause water to pool around the base of your house, increasing pressure on basement pipes and the foundation. Check outdoor faucets: Once the threat of frost is truly gone, turn on your outdoor spigots to check for flow. If you place your thumb over the opening and can stop the flow of water, the pressure is too low, indicating a potential leak inside the pipe. When to Call the Professionals Plumbing issues can be stressful, and it is often difficult to know if a problem is a simple DIY fix or a professional emergency. We understand that your home is your sanctuary, and dealing with water damage is disruptive and upsetting. If you notice persistent low pressure, damp spots on your drywall, or standing water in your yard, it is time to call for help. Attempting to dig up underground pipes or fix complex sewer lines on your own can often lead to further damage and higher costs. At Rescue Rooter, we have the specialized equipment to inspect underground lines without destroying your yard. Our team can identify cracks caused by the spring thaw and provide efficient, lasting solutions. We are here to help restore your peace of mind so you can get back to enjoying the warmer weather. Enjoying a Worry-Free Spring Spring should be a time of renewal and enjoyment, not a time spent worrying about wet basements or broken pipes. By keeping an eye out for the signs of shifting soil and testing your drainage systems early, you can catch small issues before they become major headaches. And remember, if the thaw does bring unexpected plumbing challenges, you don't have to face them alone—Rescue Rooter is just a phone call away.
Show More