Getting a new dishwasher? Installation Guide

Dawn S • February 28, 2023

Quick Guide To Dishwasher Installation in Burlington

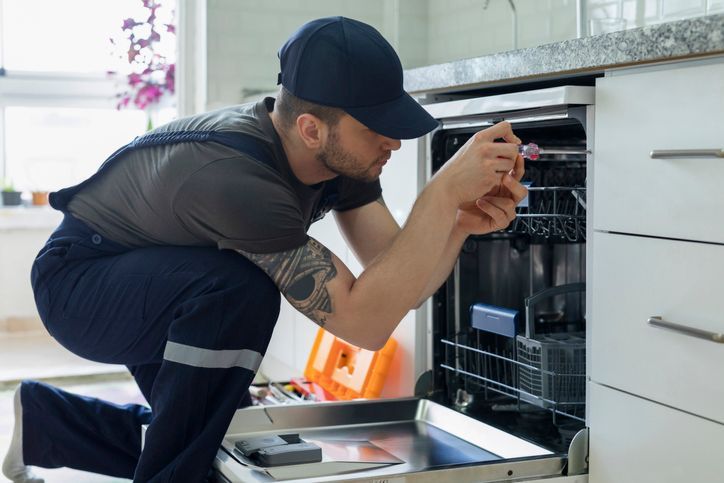
Perhaps you bought a new built-in dishwasher. Whether it’s a new dishwasher installation because you have never had one or you’re replacing on older model, you can do the installation yourself in Burlington. You can make it the dishwasher fit without a problem if you read this guide to help you with your dishwasher installation. 


A built-in dishwasher is made to fit under a kitchen counter and they usually replace the space of a cupboard or two. If the dishwasher installation is brand new, it needs to be near the sink. A good idea before you start is to unbox the appliance and slide it in to where will go before to start the installation process to make sure it fits as it should. If the dishwasher is replacing an older model make sure the old one is unhooked and discarded properly. Make sure the previous electricity and water supply are disconnected before you take care of the final removal.


Before you start the dishwasher installation process, be sure you have turned off the electricity on your circuit breaker and turned off the water at the valve under the kitchen sink. You may have to drill holes to accommodate the dishwasher’s electrical wiring, water inlet and drain tubes. If you are replacing a dishwasher, more than likely you can use the previous holes in the cupboard, If this a brand-new dishwasher installation, the owner’s manual will be a huge help. 


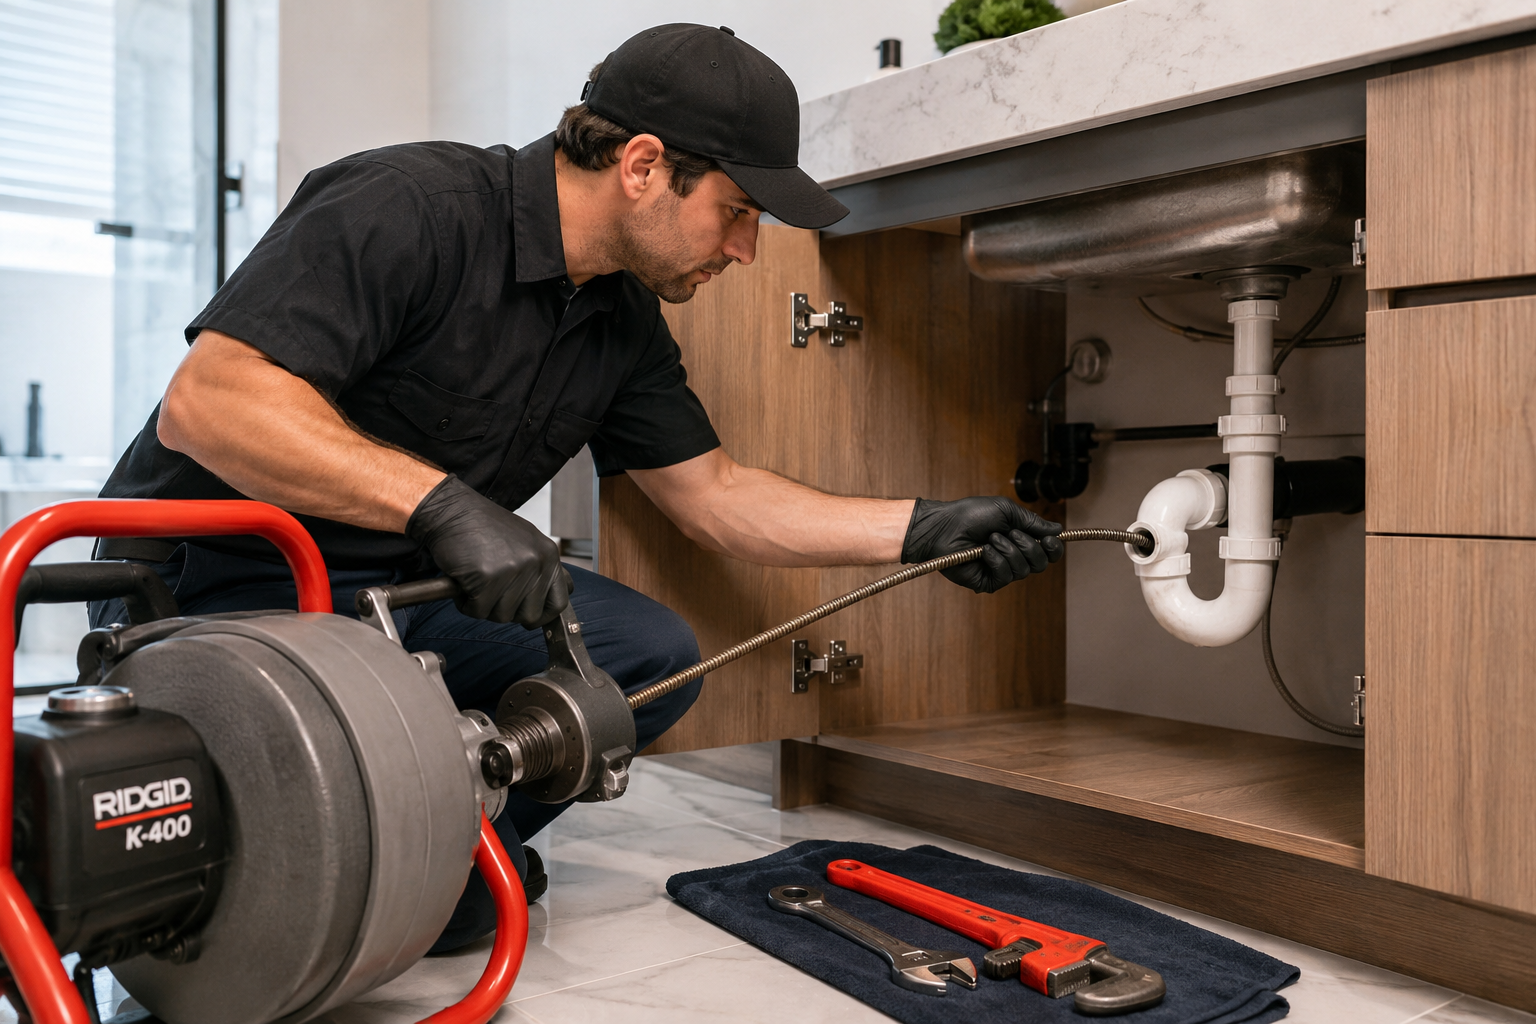
Now you will do the hook up. If you like, you can stop at any point and call the plumbing services at A Rescue Rooter in Burlington and surrounding area. Do a double-check that the electricity and water is turned off before you start this part of the dishwasher installation. Identify the electricity wire connection housing (remove its cover first.) The dishwasher comes with a power cord and thread the end you don’t plug into an outlet into there. Be sure you connect the wires of the same colour to each other. Replace the wire housing cover, thread the cord under the sink and plug it in. Keep the manual nearby during the dishwasher installation just in case you have questions. 


Dishwashers generally come with a water supply that connects to the back of the appliance that lets the water run from the back of the dishwasher. Attach that, then connect the water supply that came with the dishwasher from the valve under the sink through the hole you drilled to the piece located on the back of the appliance. A great idea is to do this step of the dishwasher installation according to the owner’s manual. Be sure not to connect the hoses too tight. The manual may not mention that. 


The last part that needs to connected in a dishwasher installation is to connect the drain hose to the dishwasher if need be. The hose should run from the dishwasher through the hole in the cabinet to then connected to the sink tail pipe (or garbage disposal unit.) Again, follow owner’s manual or don’t hesitate to call the reliable plumbing service at A Rescue Rooter. The Burlington plumbers can have your dishwasher installed in no time. When all the connections in place, slide the washer in place and then turn on the water and electricity that you turned off. Test your dishwasher installation by running a cycle while checking for leaks. 


As mentioned earlier, the plumbing services team in Burlington a A Rescue Rooter can help you if needed. They are your Burlington plumbers who are available 24/7 and  won’t charge you a premium! Call your plumbers at 905-333-6909!


January 31, 2026
Winter brings cozy nights and festive cheer, but it also carries the risk of a messy and expensive household problem: frozen pipes. When water freezes, it expands, putting immense pressure on your plumbing. This can lead to burst pipes, significant water damage, and costly repairs. Understanding how to protect your home before a cold snap and what to do if a pipe freezes is essential for every homeowner. Proactive Steps to Prevent Frozen Pipes The best way to deal with a frozen pipe is to prevent it from ever happening. A little preparation before temperatures plummet can save you a lot of stress and money. Focus on areas of your home where pipes are most vulnerable, such as basements, crawl spaces, attics, garages, and exterior walls. Insulate Vulnerable Pipes Insulation is your first line of defense. It slows the transfer of heat, keeping the water inside your pipes from reaching freezing temperatures. Pipe Sleeves: You can find foam or fiberglass pipe sleeves at any hardware store. They are inexpensive and easy to install. Simply cut them to size and wrap them around exposed pipes. Secure them with tape for a snug fit. Heat Tape: For pipes in extremely cold areas, consider using electrical heat tape or heat cables. These products wrap directly around the pipe and have a built-in thermostat that turns the heat on when the temperature drops, providing consistent protection. Seal Air Leaks: Cold air infiltration is a major contributor to frozen pipes. Use caulk or insulation to seal any cracks or holes in your foundation, walls, and around windows, especially where pipes enter your home from the outside. Keep the Water Moving Even a small trickle of water can be enough to prevent a pipe from freezing solid. When an arctic blast is in the forecast, take these simple steps. Let Faucets Drip: Open the faucets connected to vulnerable pipes just enough to let a slow, steady drip of both hot and cold water flow. This moving water is much harder to freeze. Open Cabinet Doors: Pipes under kitchen and bathroom sinks are often located in unheated cabinets against exterior walls. By leaving the cabinet doors open, you allow warmer air from your home to circulate around the plumbing, keeping them warmer. Maintain a Consistent Temperature Your home's overall temperature plays a crucial role in protecting your plumbing system. Set Your Thermostat: Keep your thermostat set to a consistent temperature both day and night. While you might be tempted to lower it at night to save on heating bills, the extra cost is minimal compared to the expense of a burst pipe repair. Winterizing Your Home: If you plan to be away for an extended period during the winter, never turn your heat completely off. Set the thermostat to at least 55°F (13°C) and consider asking a friend or neighbor to check on your house periodically. What to Do If Your Pipes Freeze Sometimes, despite your best efforts, a pipe may freeze. The first sign is usually a trickle of water—or no water at all—coming from a faucet. If you suspect a frozen pipe, you need to act quickly. Step 1: Locate the Frozen Pipe Your first task is to identify the frozen section of pipe. Start by turning on all the faucets in your house. If one is not working, the frozen area is likely located between that faucet and the main water supply. Look for pipes in unheated areas or along exterior walls. A visible layer of frost or a slight bulge in the pipe can also indicate a freeze. Step 2: Thaw the Pipe Safely Once you've found the frozen section, you can begin the thawing process. The key is to apply heat gradually and safely. Open the Faucet: Before you start thawing, make sure the faucet connected to the frozen pipe is open. This allows melting water and steam to escape, relieving pressure inside the pipe. Apply Gentle Heat: Use a hairdryer on a low setting, a portable space heater (kept a safe distance away), or heating pads designed for this purpose. Start near the faucet end of the blockage and work your way back toward the frozen area.  Never Use an Open Flame: Do not use a blowtorch, propane heater, or any other open-flame device to thaw a pipe. This is extremely dangerous, as it can damage the pipe and create a serious fire hazard. Step 3: Check for Leaks As the pipe thaws, water flow should be restored. Keep a close eye on the entire length of the pipe you just thawed. The expansion from the ice may have created cracks that will begin to leak as the water melts. If you spot a leak, shut off the main water supply to your home immediately to prevent water damage. When to Call a Professional While some minor freezes can be handled on your own, certain situations require expert intervention. A burst pipe is a plumbing emergency that demands immediate professional help. If you are unable to locate the frozen pipe, if the pipe is not accessible, or if your efforts to thaw it are unsuccessful, it’s time to call for help. Attempting complex repairs without the right tools or experience can lead to bigger problems. The pros at A Rescue Rooter specialize in emergency plumbing services, including frozen and burst pipe repairs. Our experienced technicians have the advanced tools needed to quickly locate and safely thaw frozen pipes, even those hidden behind walls. We can assess the situation, repair any damage, and help you implement long-term solutions to prevent future freezes. Don't let a frozen pipe turn into a disaster. A Rescue Rooter is available 24/7 to provide fast, reliable service when you need it most.
December 22, 2025
A small drip from a faucet is easy to spot, but what about the leaks you can't see? Hidden water leaks can silently cause significant damage to your home’s structure, promote mold growth, and lead to shockingly high water bills. Knowing how to spot the signs of these elusive leaks is a crucial skill for any homeowner. This guide will walk you through practical methods for detecting hidden water leaks and explain why acting fast is so important. Why You Must Address Leaks Immediately Ignoring a potential water leak is a gamble you don't want to take. Even a small, slow drip can have major consequences over time. Water can weaken wooden beams, crumble drywall, and damage your home's foundation. The persistent moisture creates a perfect environment for mold and mildew, which can pose health risks to your family. Beyond structural damage, the financial cost is twofold. First, your water bill will increase as you pay for water you aren't even using. Second, the repair costs for water damage are often far more expensive than the cost of fixing the leak itself. A simple plumbing repair can turn into a massive renovation project if left unchecked. Simple Ways to Find Hidden Leaks You don't need to be a professional plumber to start the search for a hidden leak. With a little observation and a few simple checks, you can often identify a problem before it gets out of hand. Check Your Water Meter Your water meter is one of the most reliable tools for leak detection. It measures all the water flowing into your home, so any unexpected activity can point to a leak. How to perform a meter test: 1. Turn off all water: Make sure no faucets are running, toilets aren't flushing, and appliances like the dishwasher or washing machine are off. 2. Locate your water meter: It's usually in a box near the curb or in a basement or utility area. 3. Check the leak indicator: Most modern meters have a small triangle, dial, or wheel that moves when water is flowing. If this indicator is spinning, even slowly, you likely have a leak somewhere in your system. 4. Note the reading: If your meter doesn't have a leak indicator, write down the numbers on the dial. Wait one to two hours without using any water, then check the reading again. If the numbers have changed, water is escaping somewhere. Scrutinize Your Water Bill Your monthly water bill provides a clear record of your usage. A sudden, unexplained spike is a major red flag. Compare your recent bills to previous months or the same period from last year. If your habits haven't changed but your usage has dramatically increased, it’s time to investigate. Many utility companies even provide daily or hourly usage data online, which can help you pinpoint when the excess water use is happening. Inspect Your Home's Interior Your walls, ceilings, and floors can offer visual clues of a hidden leak. Take a walk through your home and look for these signs: ● Discoloration or Stains: Yellow or brown stains on ceilings or walls are classic signs of water slowly seeping through. ● Peeling or Bubbling Paint: Moisture behind a wall will cause paint or wallpaper to peel, bubble, or blister. ● Warped Surfaces: Look for warped walls, sagging ceilings, or buckled flooring, especially around bathrooms, kitchens, and laundry rooms. ● Musty Odors: A persistent damp, earthy smell often indicates mold or mildew growth, which thrives in areas with hidden moisture. Listen for Unusual Sounds Sometimes, you can hear a leak before you can see it. During a quiet time in your home, like late at night, listen carefully for sounds coming from your walls. A dripping, hissing, or rushing sound when all faucets are off is a clear signal that water is running where it shouldn't be. Pay close attention to the areas where your main water line enters the house and around major plumbing fixtures. Don't Wait—Get Professional Help Finding a hidden leak can feel overwhelming, but you don't have to handle it alone. While these DIY tips can help you confirm a problem exists, locating the exact source and repairing it often requires professional expertise and equipment. A delayed response only makes the problem worse and more expensive to fix. At A Rescue Rooter, our experts are equipped with advanced leak detection technology to find the source of the problem quickly and accurately, without causing unnecessary damage to your home. We understand that plumbing emergencies don't stick to a 9-to-5 schedule. That’s why we are available 24/7 to help you.  Best of all, you can call us anytime without worrying about extra fees. A Rescue Rooter never charges a premium for after-hours, weekend, or holiday service. When you have a leak, you need help fast. We’re here to provide it, day or night. Contact us to get your leak fixed and your home protected.
November 30, 2025
This is a subtitle for your new post
Show More